Light Tunnel Tutorial

Here is a detailed tutorial created by Light Painting Photographer Stephen Knight showing how he creates his Light Tunnels or as I like to think of them Hyperloops.
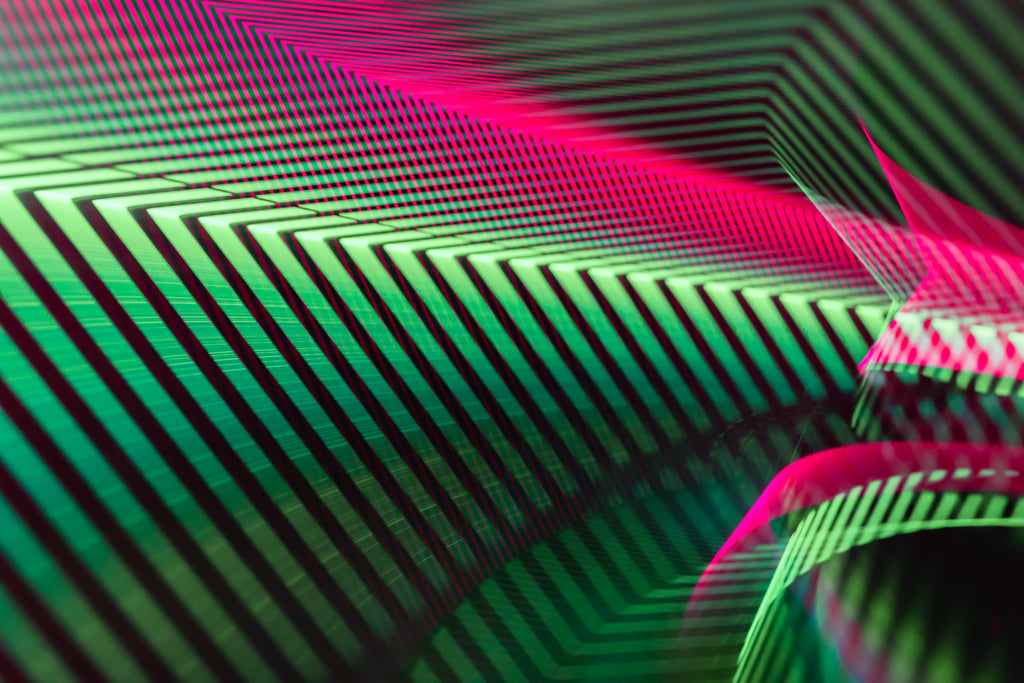
Creating a Light Tunnel effect from Plexiglass tools is a relatively easy form of light painting to master. This tutorial goes through the steps on how to create your own Light Tunnel using Light Painting Brushes Plexiglass tools. This is not a new concept in light painting, and inspiration for ideas can be found by googling terms such as “futuristic tunnels” or “space tunnels”. Usually, these tunnel effects are created in a studio setting with a black cloth backdrop, but can be also be created outdoors.
TOOLS
To create Light Tunnels, you will require a Plexiglass tool, though other tools such as the Light Whip, and Fiber Optics can create a suitably sized light trail that can also be used to create interesting tunnel effects. I have had most success with using the LPB Plexiglass Diamond and Plexiglass Circle tools. The LPB 9in Plexiglass Rectangle can work, but light is concentrated at the far edge. I’ve not personally used the LPB Plexiglass Feather, but I would expect that it would be suitable for creating tunnel effects. To avoid strange artifacts, a blade with minimal scratches on the surface is preferred, but not essential.
The edge of the Plexiglass tool can be modified to create the desired tunnel effect. The standard laser cut edge of Plexiglass tools create an interesting ridged texture. Sanding of the Plexiglass tool edges will create a brighter and more solid effect if a course sandpaper is used (60-80 grit), and a less bright but more glassy effect if smoother sandpaper (800-1200 grit) is used. Cellophane or colour gels, or using ink on the Plexiglass edges will add colour.
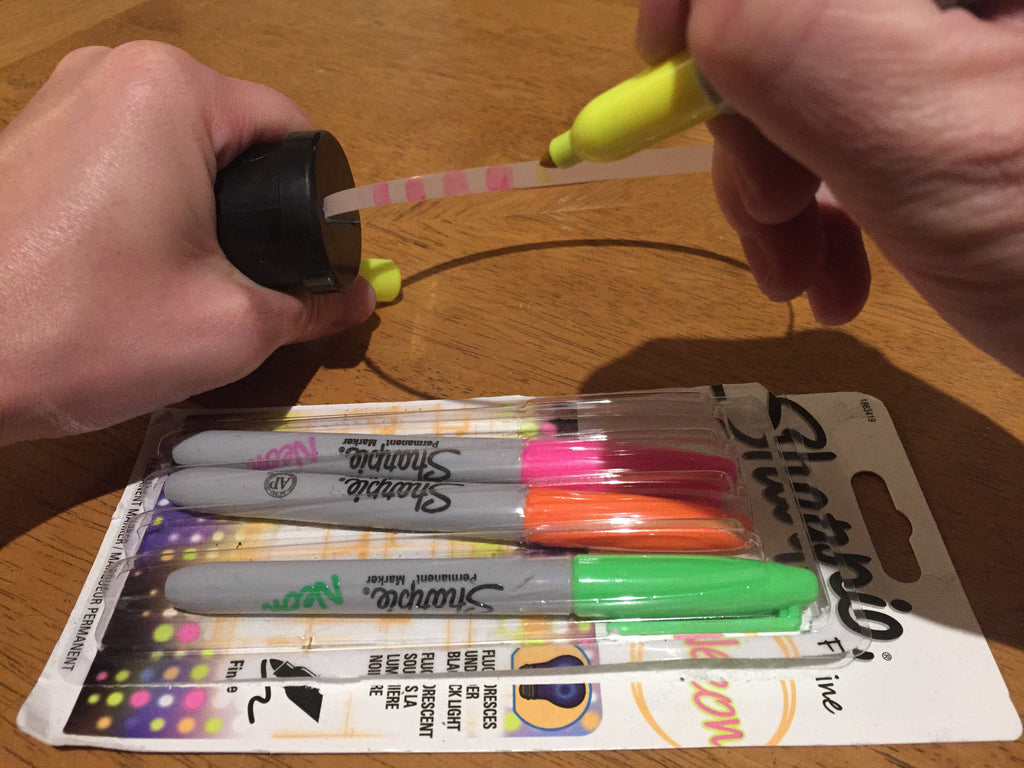
Sharpies, gel pens, or washable markers are good options for ink, which can easily be removed with magic eraser (or isopropyl alcohol), though sometimes some sanding may be required for stubborn stains. Using ink will allow for more intricate patterns, and is also faster to apply than cutting out and sticking down cellophane and gels. Cellophane or colour gels on the input edge of the Plexiglass tool or placed in the LPB Universal Connector will also add colour.
TIP: Always do a small test when using new ink and ink remover combinations, to check that damage does not occur.
LIGHT SOURCE
The flashlight mode for the flashlight used in the LPB Universal Connector is also critical in creating eye-catching effects. A continuous light mode will create smooth light trails, great for the original laser cut edges. Strobe modes will result in rings. Higher frequency strobes (such as 20Hz strobes on some Ledlenser and Walther Pro lights) will create more tightly packed rings than slower strobes (such as around 10Hz found on the Convoy S2+, Thorfire VG15, MHVAST TG20, Zanflare F1, and Nitecore P10GT, or 12.5Hz on the Atactical A1S and Thrunite TC12v2). Generally, the flashlight doesn’t need to be turned on and off during the exposure, and thus it doesn’t matter if your flashlight has to be cycled through other modes to get to strobe. I often utilise the PWM from low mode (or high mode after 5 minute step-down) from the Ledlenser P7QC, and the Color Shine Flashlights.
My favourite light source for Blade Tunnels is the Concentrate by Threeworlds C5 RGB LED Light unit. The C5 can be programmed to create a large array of multi-colour effects – 4 colour fast strobe effect (for which you can program each of the four colours) being very effective. Despite owning one of these for a few months, I think I’ve only scratched the surface of potential effects.
CAMERA EXPOSURE AND FOCAL LENGTH
A range of focal lengths can be used as long as the starting position for the blade is outside of the field of view - I typically use between 28-50mm at 35mm equivalent. The focus point is a bit trial and error, and usually between 30 to 40cm from the lens. I prefer to put the lens into autofocus mode, focus on the illuminated light blade, and then lock the focus point by switching back to manual focus. To add a sense of depth in the photo (e.g. out of focus foreground and background) I would advise using a relatively wide aperture. I most commonly use f/5.6 to f/8 on an APS-C sensor camera. Exposure time will vary on your desired outcome, but most of the tunnel effects use 1.3 to 2 seconds Creating multiple tunnels in a single exposure will require longer exposures, as well as the ability to turn the flashlight on/off into the desired mode during the exposure. ISO will need to be varied to get an optimal exposure.
MOVEMENT
The LPB Universal Connector is held (usually by an outstretched hand) with the flat side (not the edge) of the Plexiglass tool facing the lens. The edges of the tool should be outside of the lens field of view at the start of the exposure.
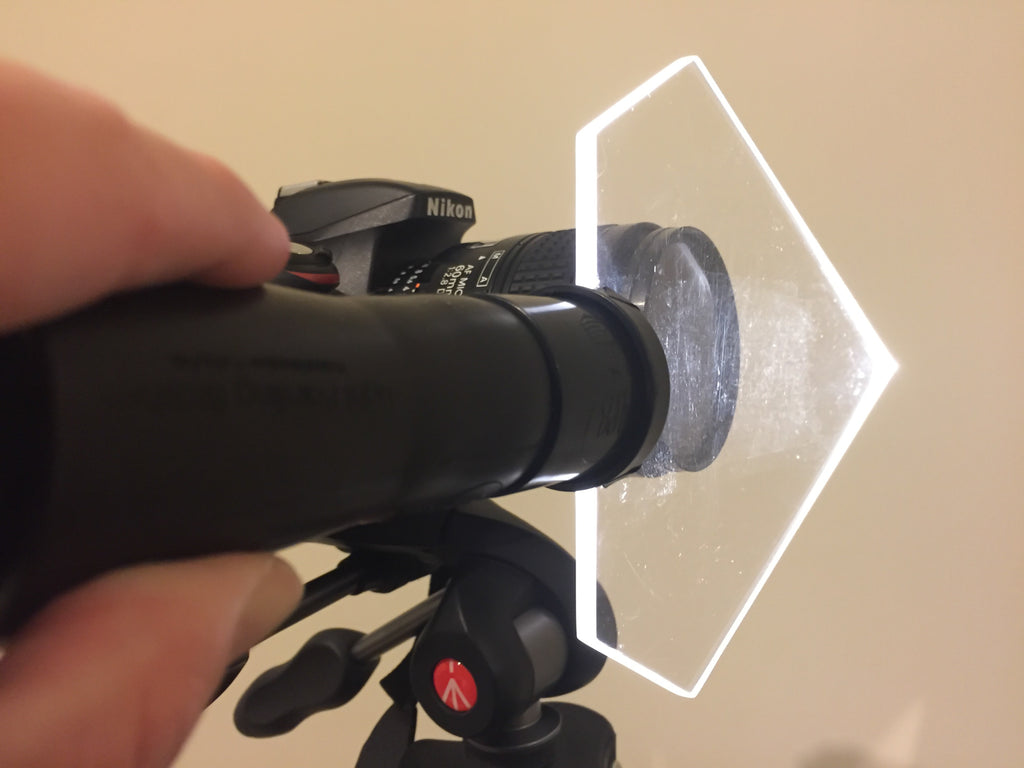
As soon as I hear the shutter mechanism open, I move the Plexiglass tool away from the lens. Most of my movements are in an arc. However, sometimes I might position myself closer to the camera and add a twisting motion. Twisting the tool on its long axis can also create unusual effects. If you want a smooth (non-shaky) movement, you need to move your arm fairly quickly, or at least concentrate on your arm movements through the air. Too slow, or shaky movements is where many beginners go wrong. It is normal to take many attempts until you are happy with the exposure, focus, and movement.
EDITING
Whilst I have found that “Straight Out of Camera” images can be adequate, tunnel effects do often lend themselves to some global, and occasionally local/brush level adjustments in post-processing. This is due to the far edge of Plexiglass tools getting more light than the sides. If there are scratches on the Plexiglass tool, an increase in contrast or use of de-haze can reduce the image artifact.

CONCLUSION
There are lots of possibilities with creating tunnel effects with the Light Painting Brushes tools. Combining the Light Painting Brushes Plexiglass tools with other Light Painting Brushes tools can also allow for unique tunnel effects. As always with light painting, find inspiration from others, have fun and please try and put your own twist on things!